Here is how we can add the fog effect to any image, using gimp.
Lunch gimp and click on
Browse to the photo that is to which the fog effect has to be added and click on open.
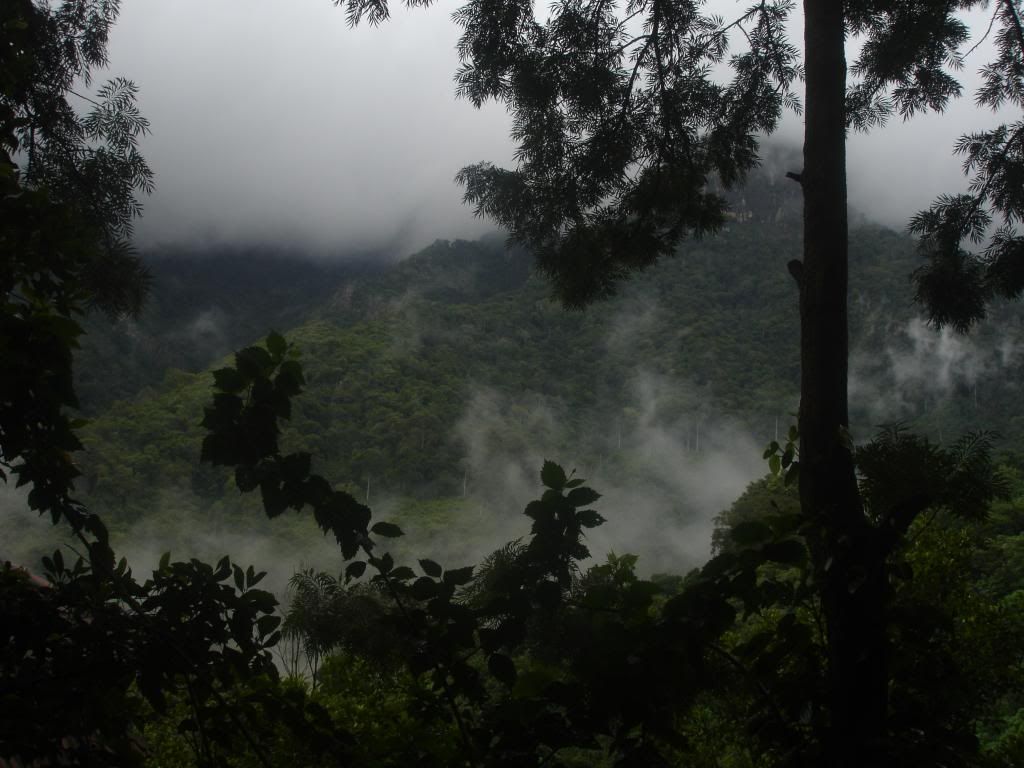
In the example we will use the following image to add the fog effect.

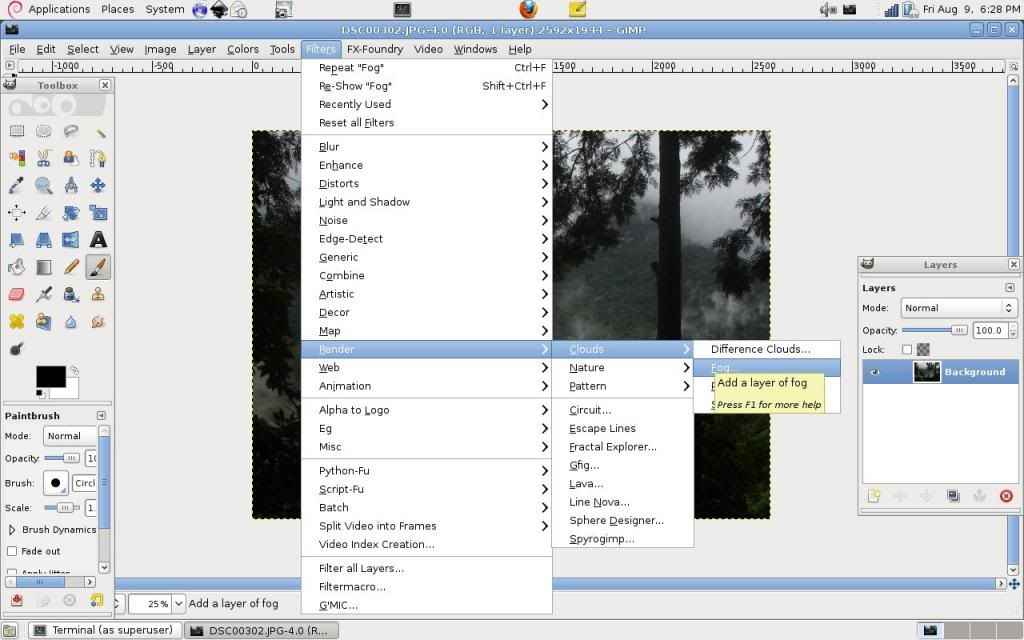
Now click on

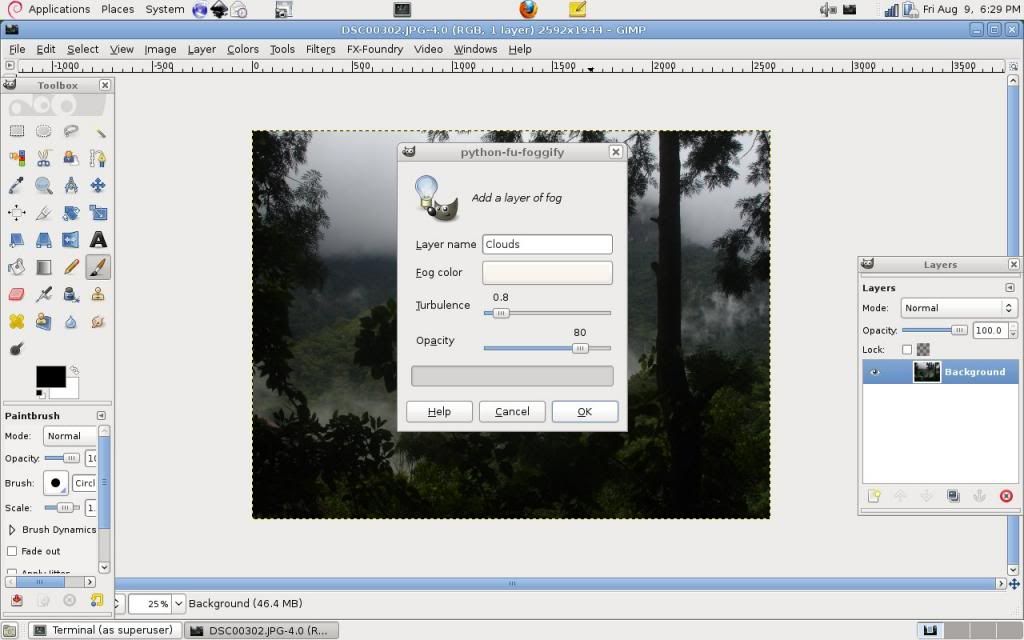
This will launch a window as shown below.

The options available are
Name: Layer Name Color: The color of the fog Turbulence: How much fog should be added to the image Opacity: How opaque should the fog be.
Click on OK and wait for gimp to do the magic.
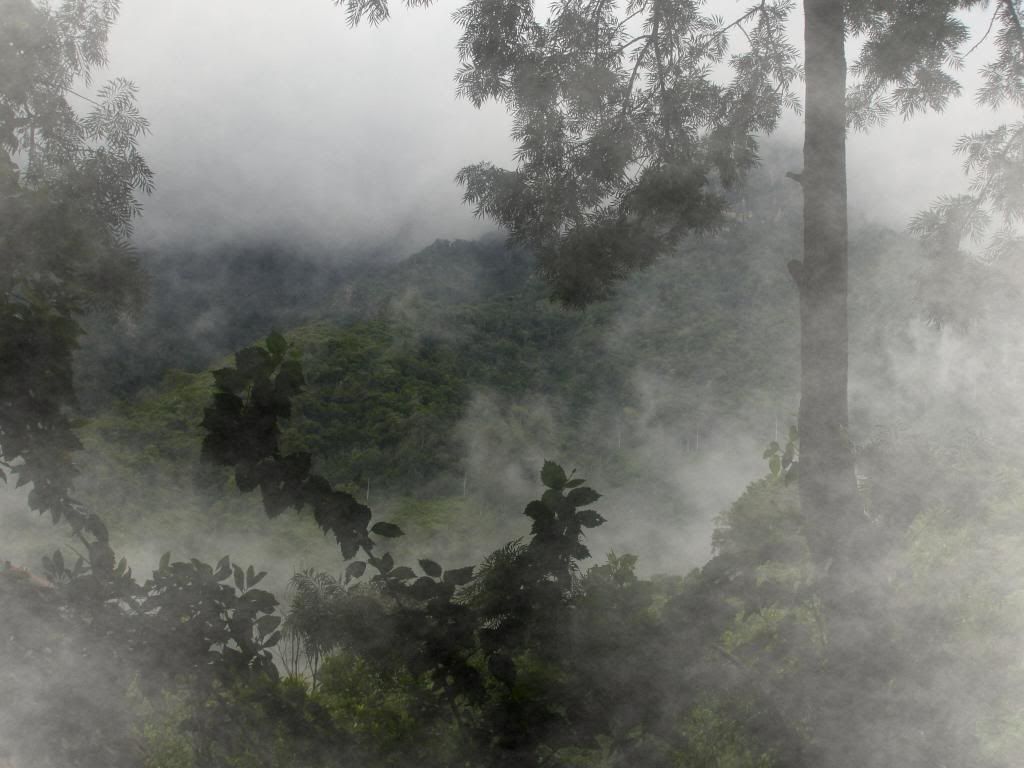
After applying the fog, the above image looks as below.

Lunch gimp and click on
Browse to the photo that is to which the fog effect has to be added and click on open.
In the example we will use the following image to add the fog effect.

Now click on

This will launch a window as shown below.

The options available are
Name: Layer Name Color: The color of the fog Turbulence: How much fog should be added to the image Opacity: How opaque should the fog be.
Click on OK and wait for gimp to do the magic.
After applying the fog, the above image looks as below.

0 comments:
Post a Comment