We often want our images to have some text carved on it. Here is how we can do it easily using gimp.
Launch gimp and click on File->Create->Logos->Carved
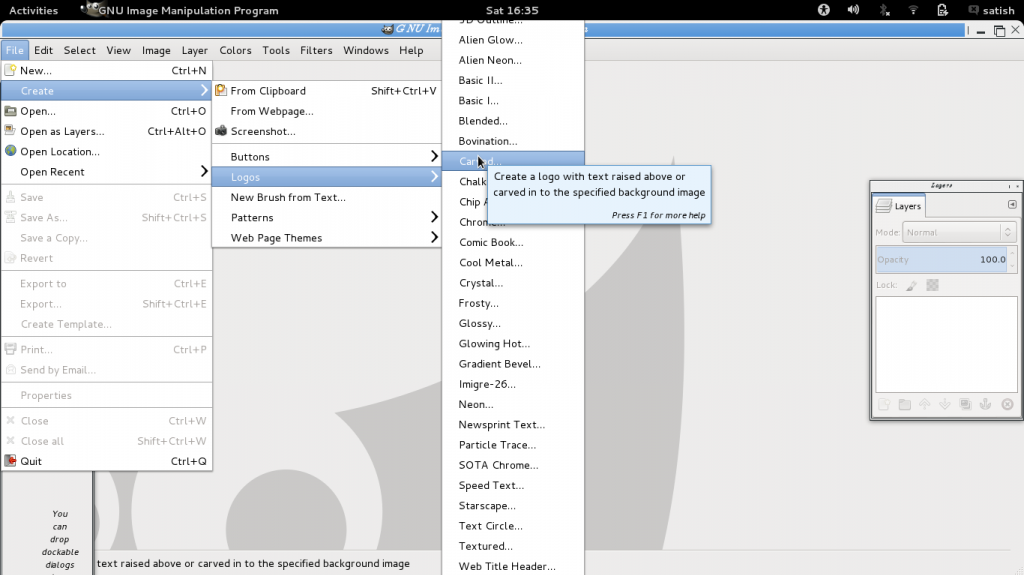
The following menu will appear.
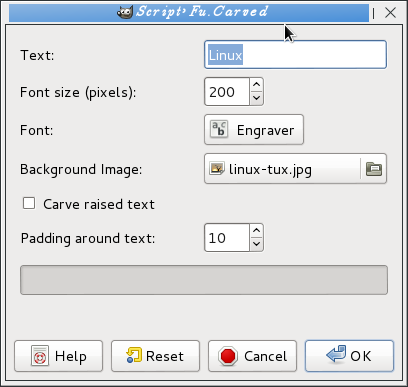
In the text field enter the text that has to be carved on the image.
Font Size: The size of the font to be engraved. Select this carefully depending on the size of the image.
Font: The fonr to be used for the characters of the text.
Background Image: Browse and select the image on which the text need to be carved.
Carve raised text: We can tick this check box when we want the text to stand out in a raised manner from the image.
Padding around text: How much spacing should be between the image borders and the text.
For our example we will write the word Linux on the image of the "tux", the linux penguin.
After setting all the above fields click on ok.
The gimp screen will come up with the carved text. The default color of the text is almost white as shown below.
The color can be changed by using the bucket tool available in the toolbox and filling the characters with our desired color by selecting the top most layer among all the layers.
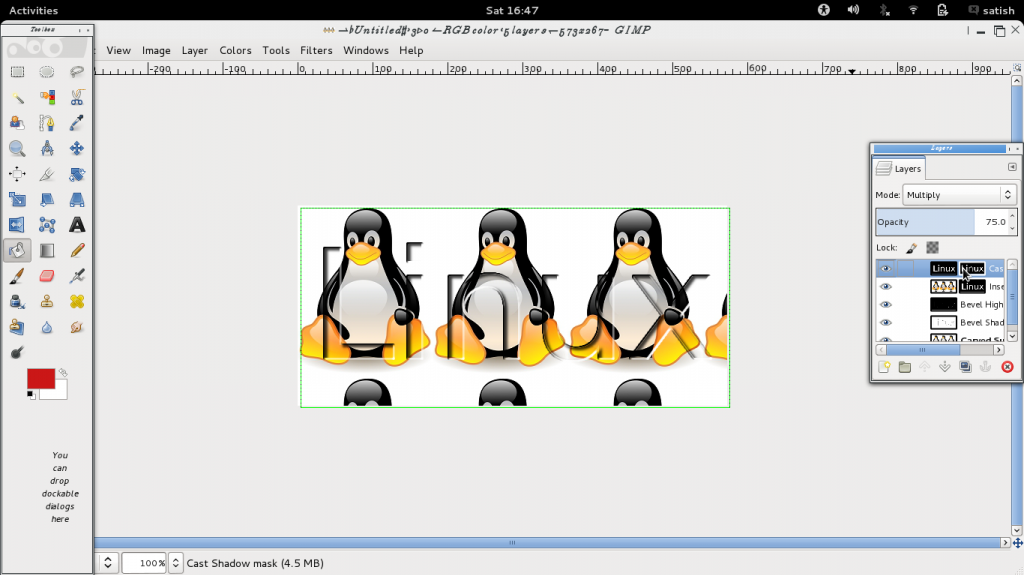
After coloring we will have to export the image using File->Export and choose the path and name for the final file. The following is the final result after coloring the text red.

Note that the image being small, it has been repeated to accommodate the whole text.
Launch gimp and click on File->Create->Logos->Carved

The following menu will appear.

In the text field enter the text that has to be carved on the image.
Font Size: The size of the font to be engraved. Select this carefully depending on the size of the image.
Font: The fonr to be used for the characters of the text.
Background Image: Browse and select the image on which the text need to be carved.
Carve raised text: We can tick this check box when we want the text to stand out in a raised manner from the image.
Padding around text: How much spacing should be between the image borders and the text.
For our example we will write the word Linux on the image of the "tux", the linux penguin.
After setting all the above fields click on ok.
The gimp screen will come up with the carved text. The default color of the text is almost white as shown below.
The color can be changed by using the bucket tool available in the toolbox and filling the characters with our desired color by selecting the top most layer among all the layers.

After coloring we will have to export the image using File->Export and choose the path and name for the final file. The following is the final result after coloring the text red.

Note that the image being small, it has been repeated to accommodate the whole text.
0 comments:
Post a Comment